When you think of a caftan, you might immediately visualize Elizabeth Taylor swooning around in her beautifully flowing silk robes, or your mind may float its way to the 1970s and Bea Arthur in Maud, or even Mrs. Roper for the 1977 – 1984 sitcom Three’s Company. The caftan has recently experienced a resurgence in popularity, partly due to the Tiki Community, as well as vintage reproduction sewists who have been scooping up caftan sewing patterns. Social media is abuzz with the stylish, loungeworthy garments! I even have plans to make one or two myself. The caftan, however, isn’t a modern invention; it has a long, rich history that goes beyond the 1970s. If you want to find out more about the Caftan, watch this video.
What is a caftan/kaftan?

Before we dive into the history of the caftan, I wanted to explain why I am doing these types of videos. In today’s culture, we wear garments based on other cultures, and there is an important history behind these garments. If we’re going to wear or design clothing based on any of this, we must understand the history of that particular culture. The vintage and vintage reproduction community embraces historical clothing and costumes, and sometimes we are so excited about finding a vintage piece or a pattern to replicate that we tend to forget its origins. I think it is really important to understand this. Right now, the caftan has made a massive resurgence, and this is partly due to the tiki community. As well, we’re now seeing a lot of people scooping up old caftan sewing patterns, and modern designers are recreating the patterns so everyone can access them. I think this is wonderful, but this is an example of what I just mentioned. We need to understand where it all began.

I also want to mention this is not going to be a super in-depth history lesson about the caftan. I wanted to give you a brief history before we talk about modern looks and where you can find resources and ways to recreate the caftan. I have been intrigued for a very long time about this garment, and I have waffled back and forth about doing a more in-depth series specifically about the different cultures and eras that have worn the caftan. If this is something that is of interest, please let me know when I can do a multipart series about the history of the caftan.

Now on to the history.
A caftan is a garment whose design is a variation of a robe or tunic. I’ll get a little more in-depth about where it possibly originated, but the general knowledge of the caftan is that it originated in Asia, and it’s been worn by many different cultures around the world for thousands of years. Some cultures also have slight variations on the caftan.

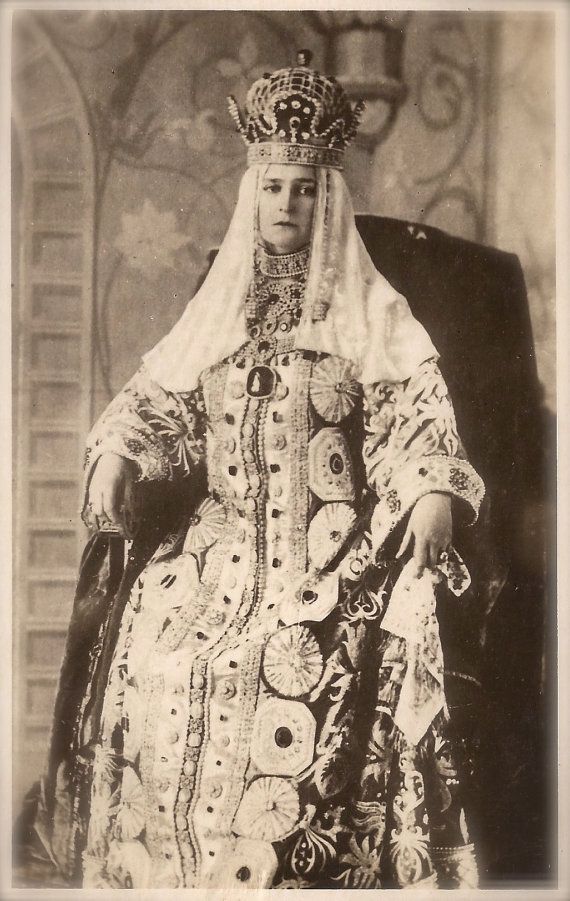
A caftan can be made in a variety of different fabrics, including wool, cashmere, silk, or cotton, and most of the time it is either worn with a sash or it has a sash built into the garment. It can be made with a plain fabric or it can be incredibly elaborate with beading, sequins, and embroidery. Plainer fabric caftans would normally be worn by everyday people, and ones that are much more elaborate would usually be worn by heads of state or royalty.
In some cases, it would be worn as a day-to-day garment, and in other cases, it would be a coat or part of an entire ensemble. Most would also be floor length as opposed to some more modern ones, where they are just below the knee. But in almost all cases, they would be flowing and very loose-fitting for comfort.

Now that we know a little bit more about what exactly a caftan is, let’s talk about where it all began.
Every piece of clothing you wear has a history, inspired by another garment of our past, whether it be a more recent past or centuries ago. The caftan is one of these garments and is much older than you might imagine. There has also been a lot of discussion around exactly where the true origins of the caftan come from. Some believe it is based on the Japanese kimono, while others argue that the original caftan is based on the caftan worn in the 830s, Byzantine Empire. When you look at today’s caftans, they resemble more of a Middle Eastern style caftan as opposed to the kimono; however, I do see why you would think it comes from one or the other.

The caftan wasn’t just worn in Japan or the Middle East; many other cultures also embraced this beautiful, flowing garment. The history of the caftan can be seen in Africa, Asia, and Russia.

From my research, the earliest version of the caftan seems to have been worn in 830 in the Byzantine Empire, as I mentioned above. The caftan was and still is incredibly popular in hot climates, due to its breathability and flowing fabrics. You could cover up from the sun and remain somewhat cool.
Another incredibly interesting part of the caftan history is that it appears to be the oldest Turkish dress. It can be traced as far back as the Hun, the Ottomans, and the Göktürks periods. These garments can also be found in some Hun tombs as well.
Many of these garments were manufactured from fabrics made in places such as Istanbul and Bursa, but some of those fabrics even came as far away as Venice, Genoa, Persia, India, and sometimes even China. I can only imagine how stunning these fabrics would be and what the completed caftans would look like. They would be breathtaking.
Depending on what part of the world you’re in, you would wear the caftan differently. For example, in West Africa, the caftan was worn by both men and women and usually was a robe that was pulled over the head and worn with pants that would have a drawstring at the waist.
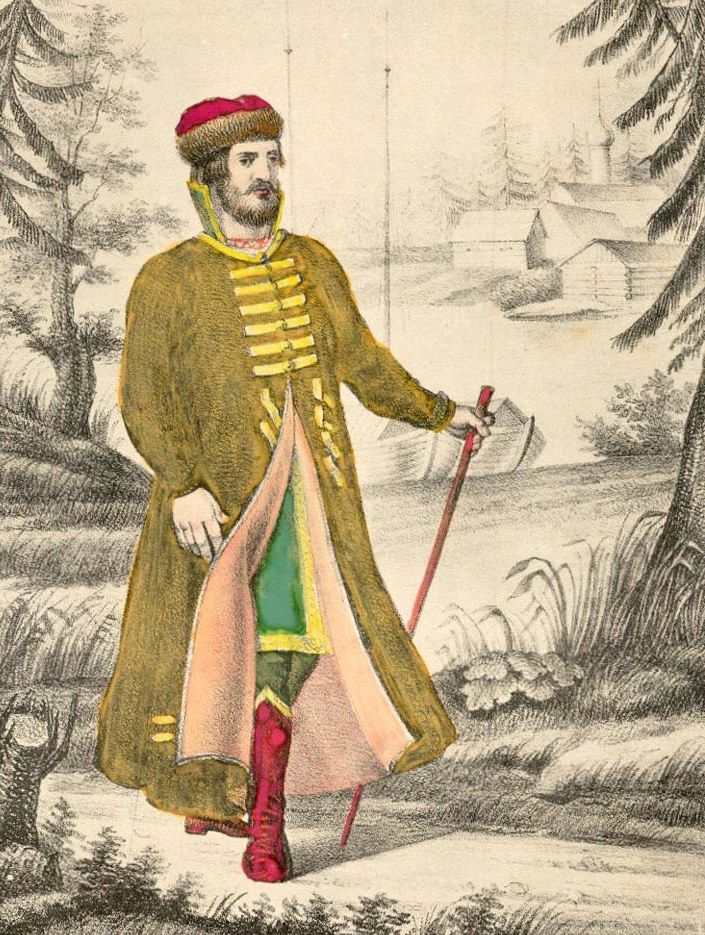
In Russia, it refers to a style of men’s long suits with tight sleeves
Other countries and communities might wear the caftan belted, while others will have it remain loose. Different countries would have different types of fabrics, colors, and textures. This would all depend on the fabrics that were available to them and the fabrics that would be most comfortable for them in their climate.
Different religious communities would also wear the caftans, such as the Jewish communities or the Muslim communities. In those cases, they would often be a specific color and worn in a very specific way due to that culture or religion.

So that was a brief history of the caftan, bringing us up towards modern times. As I mentioned above, I am more than happy to do a more in-depth series about this, as the culture and history of this remarkable garment are quite in-depth and very interesting.

What would the modern caftan be? As I mentioned above, the tiki community has helped to bring back the popularity of the caftan, but before that, you would have seen it in movies, television, magazines, and photographed on a variety of celebrities, going back as far as the 1950s. As with many types of fashion, it does get popularized more when a person of fame wears it. Elizabeth Taylor is one of the most iconic actors who was photographed (quite often) wearing one. There are even photos of Marlon Brando wearing one, and on television, the wonderful Mrs. Roper is also someone who comes to mind. She is also honored with a Mrs. Roper Day every year, where there is a gathering and parade of red-wigged, caftan-wearing fans.
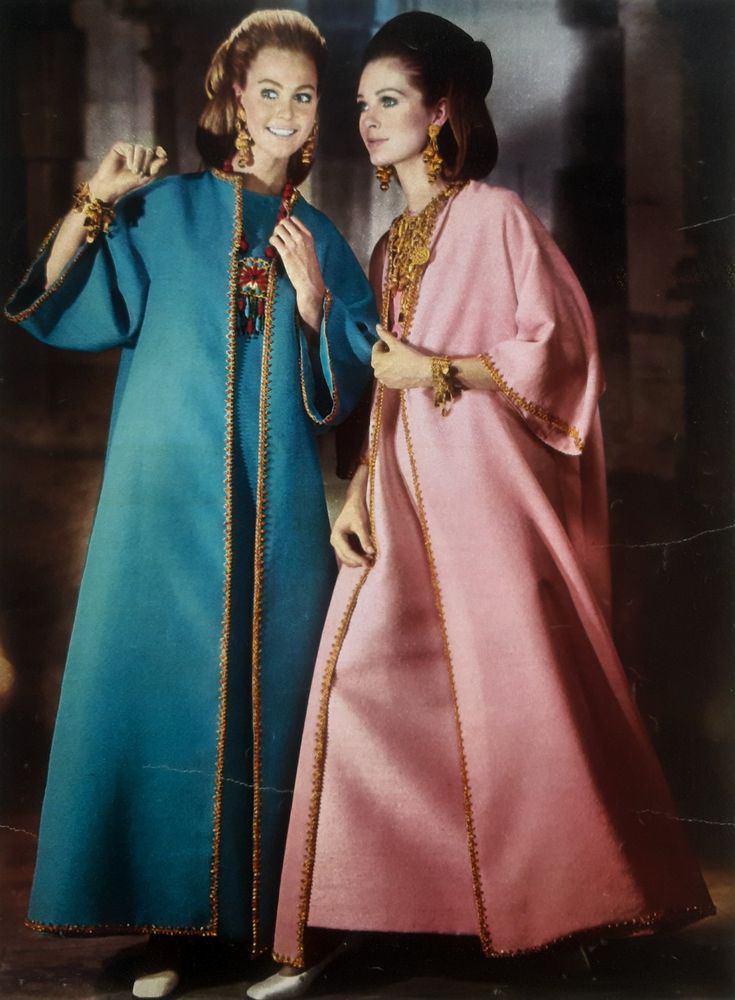
Before its current wave of popularity, the caftan was incredibly popular in the 50s, 60s, and 70s. It was boldly embraced by the hippie culture, especially.

In the 1950s, designers such as Christian Dior and Cristobal incorporated caftan-inspired elements into many of their collections, and that included dresses and coats that would also have very high slits.
As they are today, they would be worn for a variety of reasons, from lounging at home to wearing them as a Hostess Dress or, of course, if you’re lounging by the pool or at the beach, you can wear them as a cover-up later. As with historical costumes, fabrics range from very comfortable cottons up to very fancy silks and brocades.

As we move into the 1960s and 1970s, the caftan has now become part of the hippie and bohemian lifestyles, and most people started associating it with that culture. Though you are still seeing celebrities like Elizabeth Taylor wearing the caftan on a variety of different occasions. She was photographed a lot in some of the most beautiful fabrics that you would see at that time.

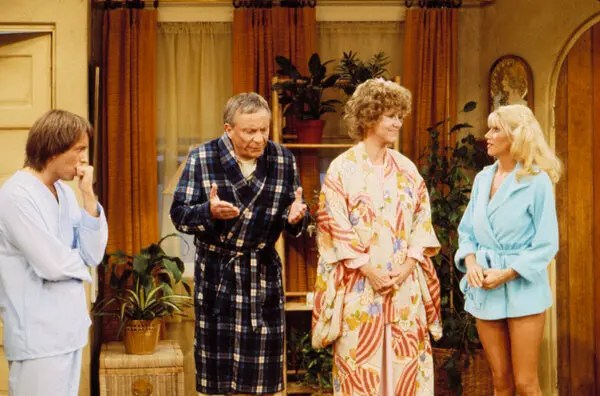
Then, as we move into the mid-70s, we’re seeing the caftan becoming a regular part of television shows. As I mentioned in my intro, Bea Arthur wore the caftan occasionally in the television series Maud, and then, of course, our beloved Mrs. Roper made it incredibly popular as a very fun way to lounge around the home. She would accessorize with the most outrageous jewelry, and I absolutely adored it when I watched it back in the ’70s, as well as when I watch the reruns now. She is my absolute favorite part of that entire show, and there has been a love for her for many decades. As I mentioned above, there is a day that is dedicated to her, and I love that.

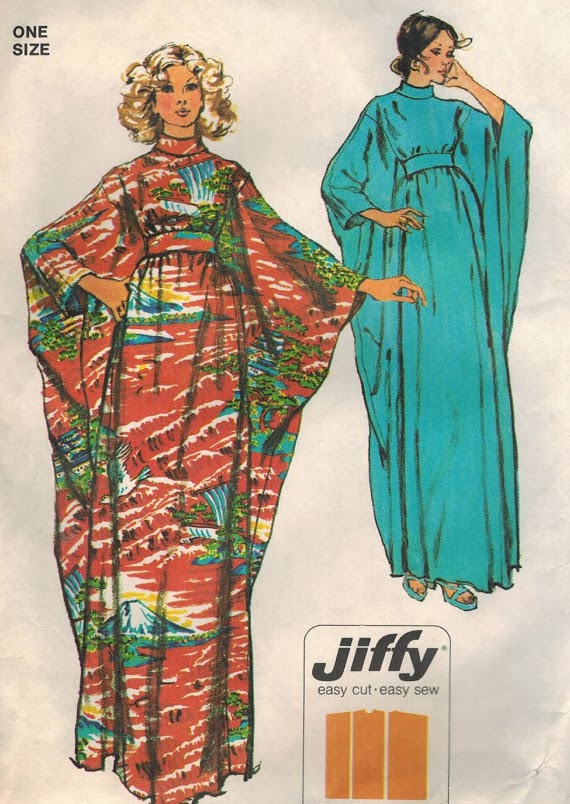
I have been wanting to make one myself, and I do have a sewing pattern right here. I have many friends who have made this, and currently, there is a version of this over on Gertie’s Patreon in case you are a member. I did have a struggle trying to find this particular pattern. Everywhere I looked, it was sold out as it has become super popular. I believe it is because of the ease of making it. I have fabric set aside for it, I just need to find time to make it. I don’t want to just make it for summer; I think this would be a lovely lounging garment for the colder months as well. I mean, think about it, a Halloween-themed caftan! Raise your hand if you’re there with me.
I hope you enjoyed this history lesson, although brief, about the caftan, as well as a little bit about what is happening in modern culture with it.
If you enjoyed this video, please subscribe, give this video a thumbs up if you liked it and also, I now have memberships on this channel and those memberships do include early access to weekly videos, eventually I’ll do semi-regular members only chats, you’ll get discounts to new products, I’ll also do some members only posts, videos and possibly some tutorials shortly. It does not cost that much to join, and it helps out my channel.
I have a Patreon. I would love it if you became a member. https://www.patreon.com/killerkitschdesigns
If you are inclined, I have a Ko-Fi account. All donations are appreciated and will help me upgrade my equipment (lighting, microphones etc).
Thank you so much! https://ko-fi.com/killerkitschlizzie
Other links to follow! Discord: https://discord.gg/yPeZRJpWpk
Instagram: https://www.instagram.com/killerkitsch13/
Facebook: https://www.facebook.com/killerkitsch13
Website: https://killerkitschdesigns.com/