


Welcome to Part 2b of our adventure. In this part we will draft the sloper front piece. Now that you have had practice with just the bodice sloper for the back piece, this will be a lot easier to understand!
Ok? Ready? Yeah! Let’s get to making that dress sloper!
The Steps:
Front of Foundation
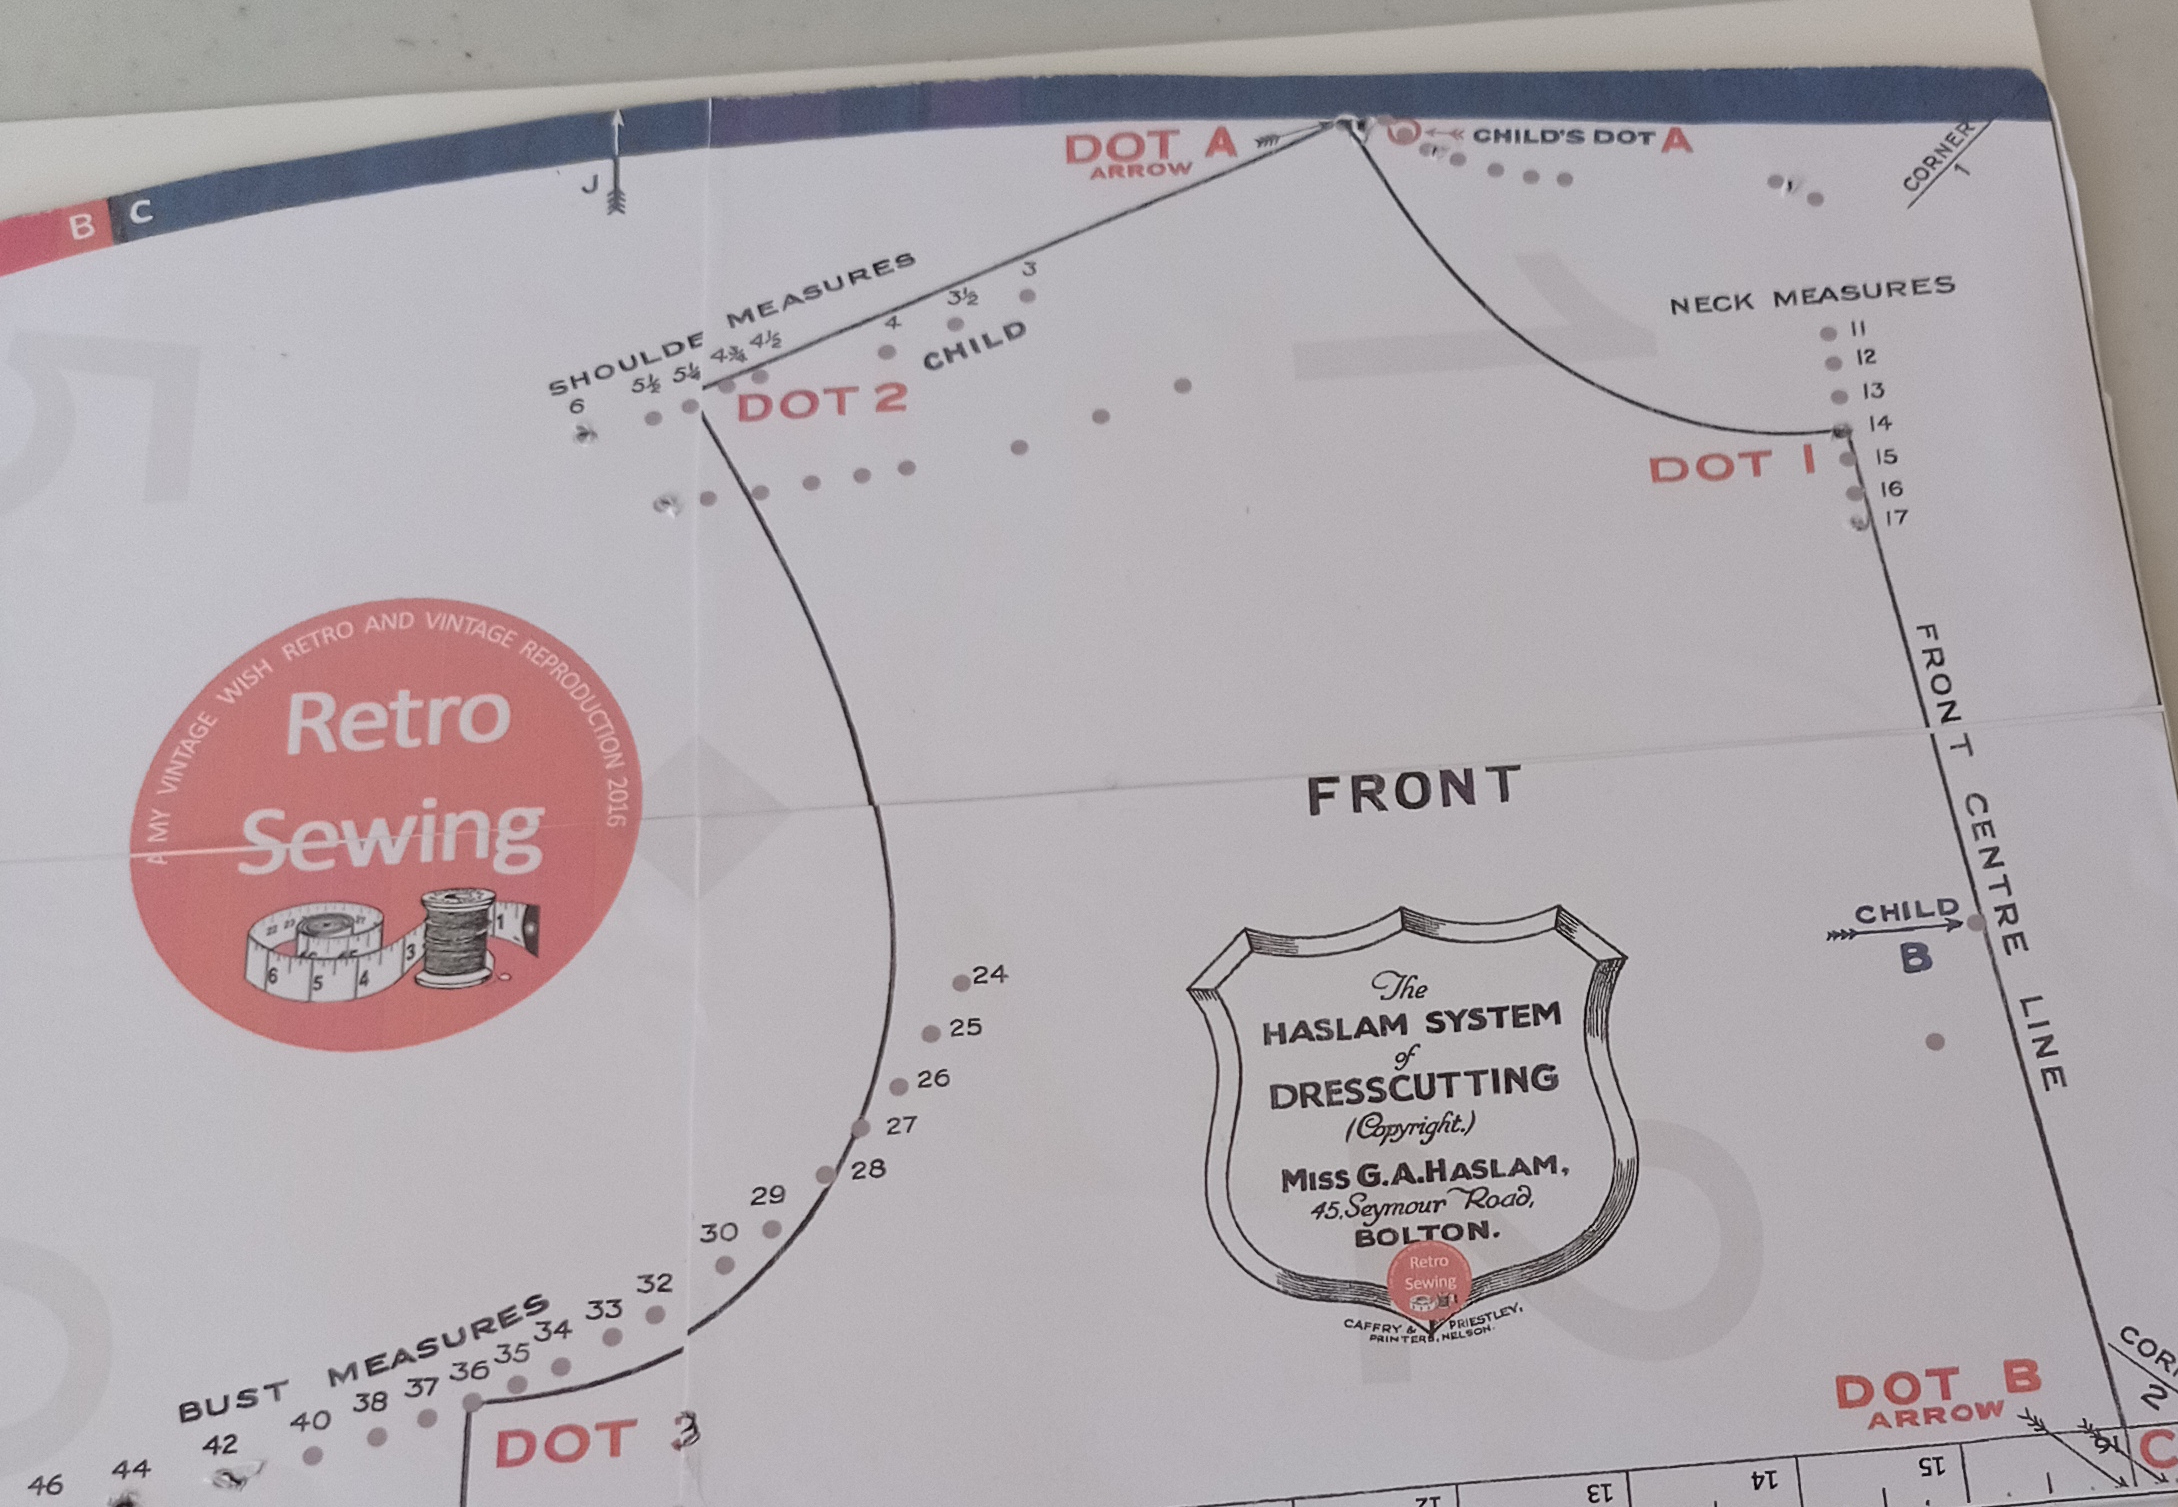
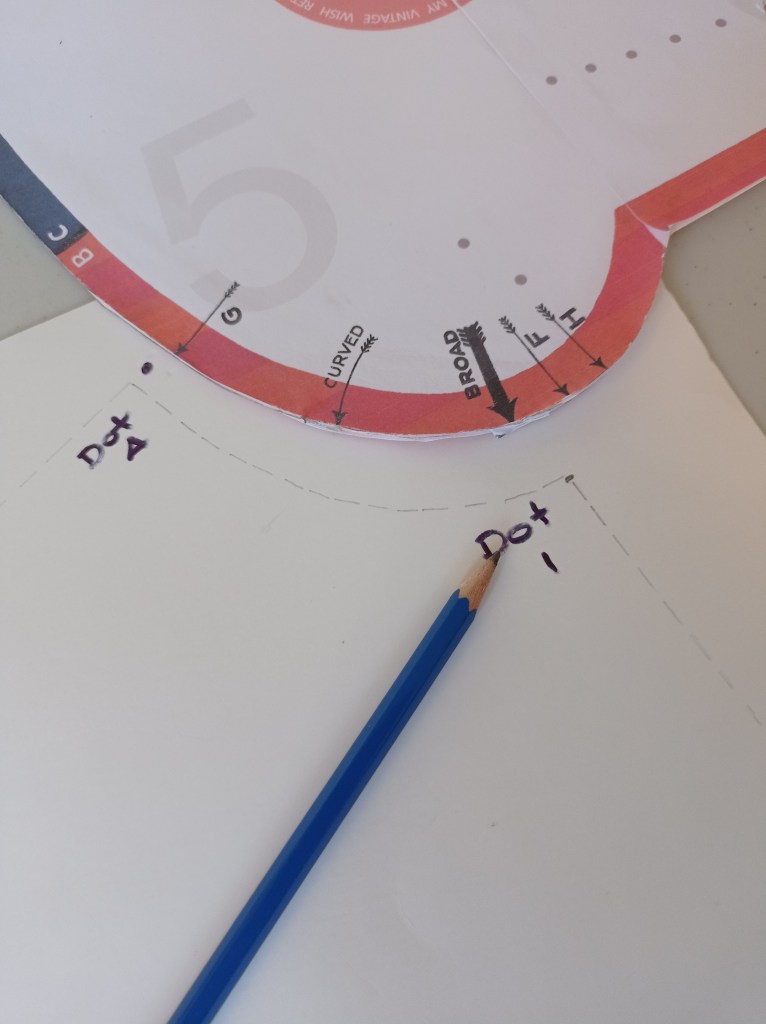
Place the Chart on the paper with the long straight edge toward you, and the right-hand edge on the edge of the paper.
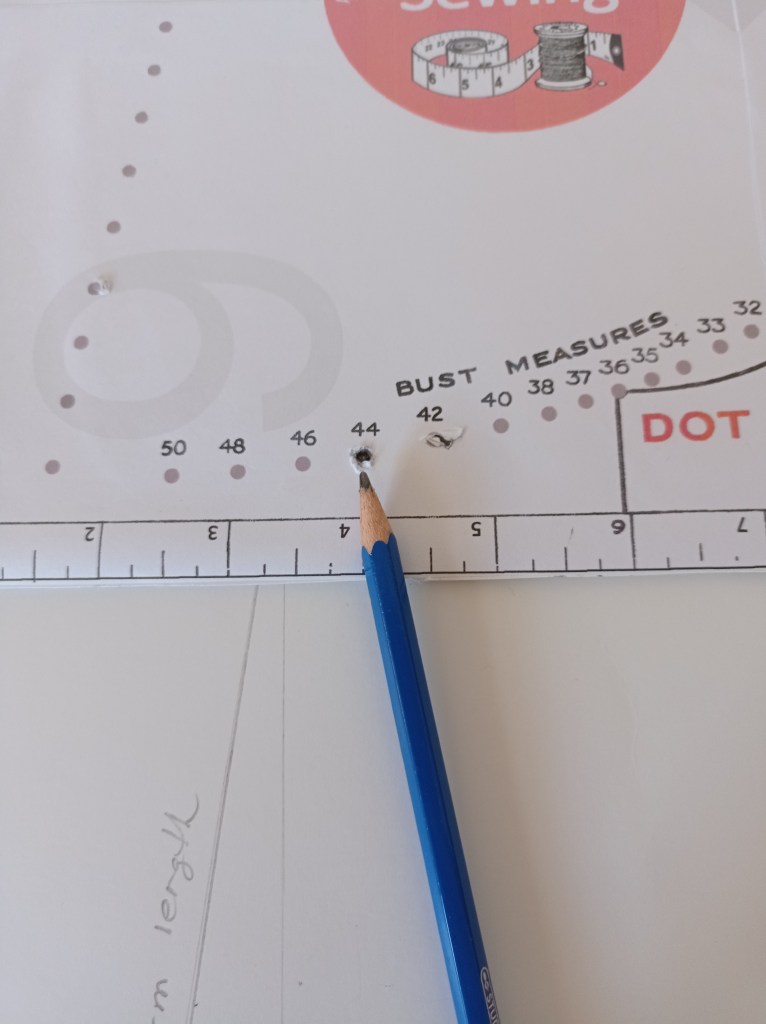
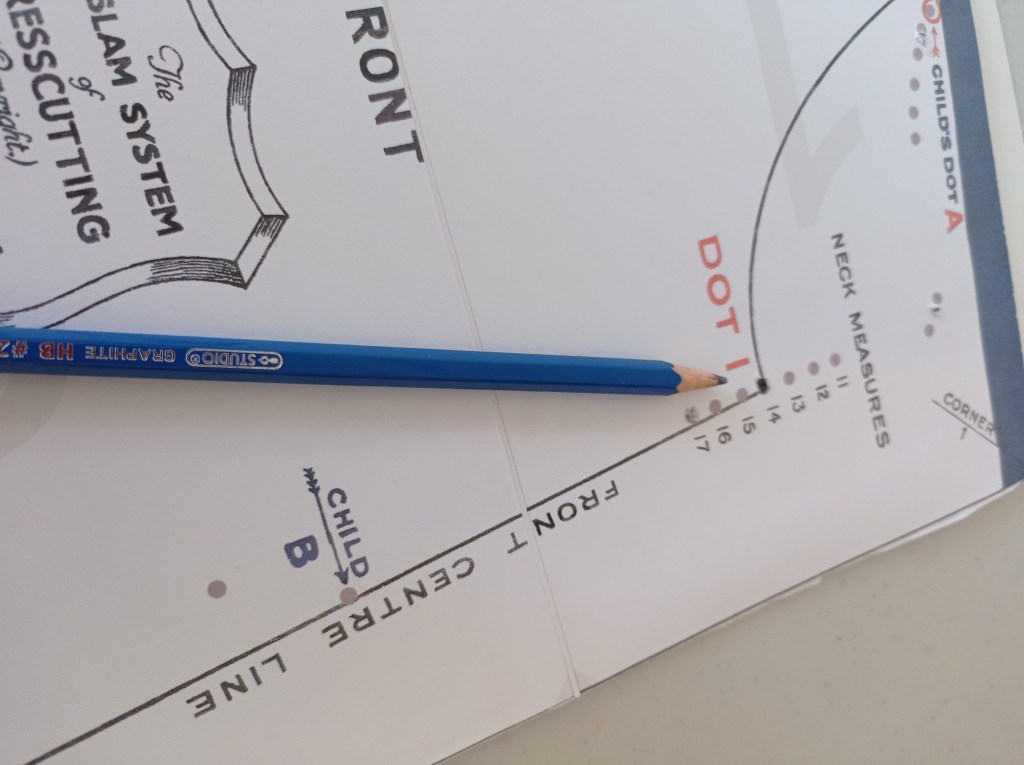
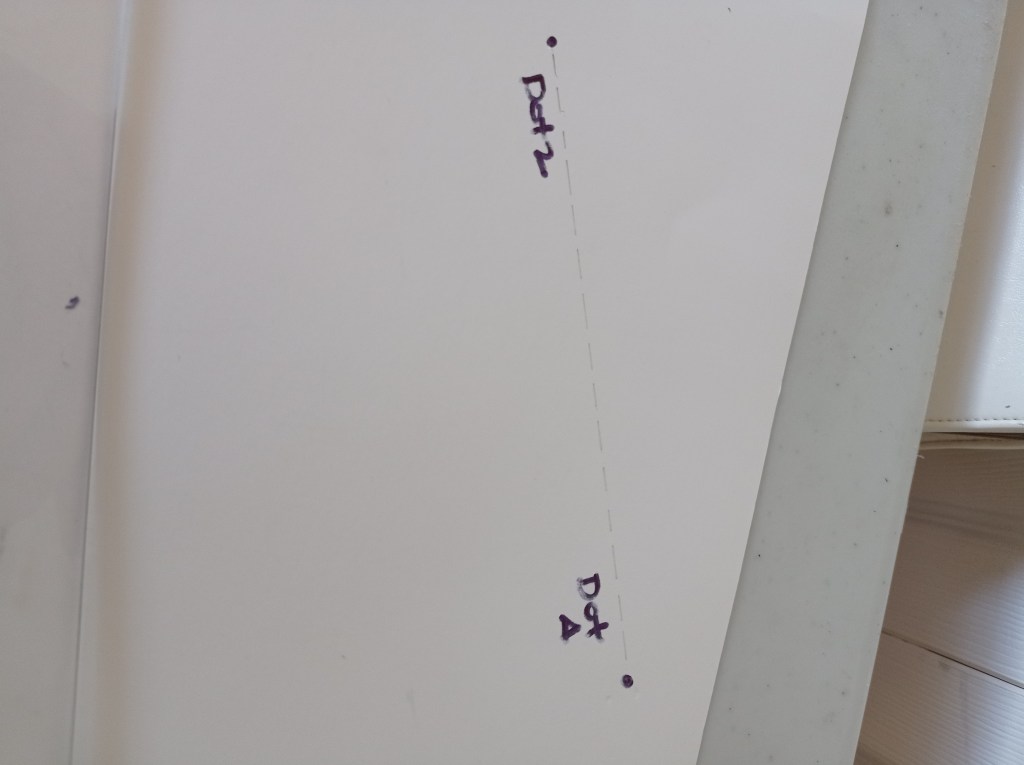
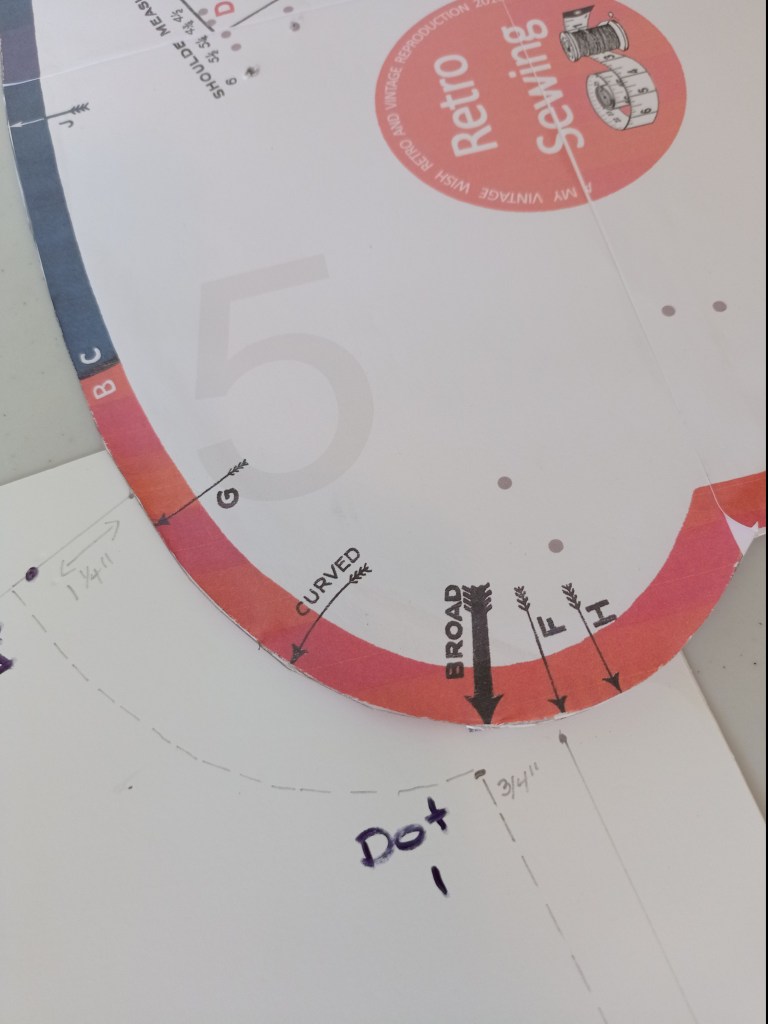
For these dots, you won’t be moving the template around, please try your best to keep it in the same spot. In the images, I have the pencil pointing at the dot you should be making.
Now make the following dots (steps below in photos):
Dot 1 (neck measurement)
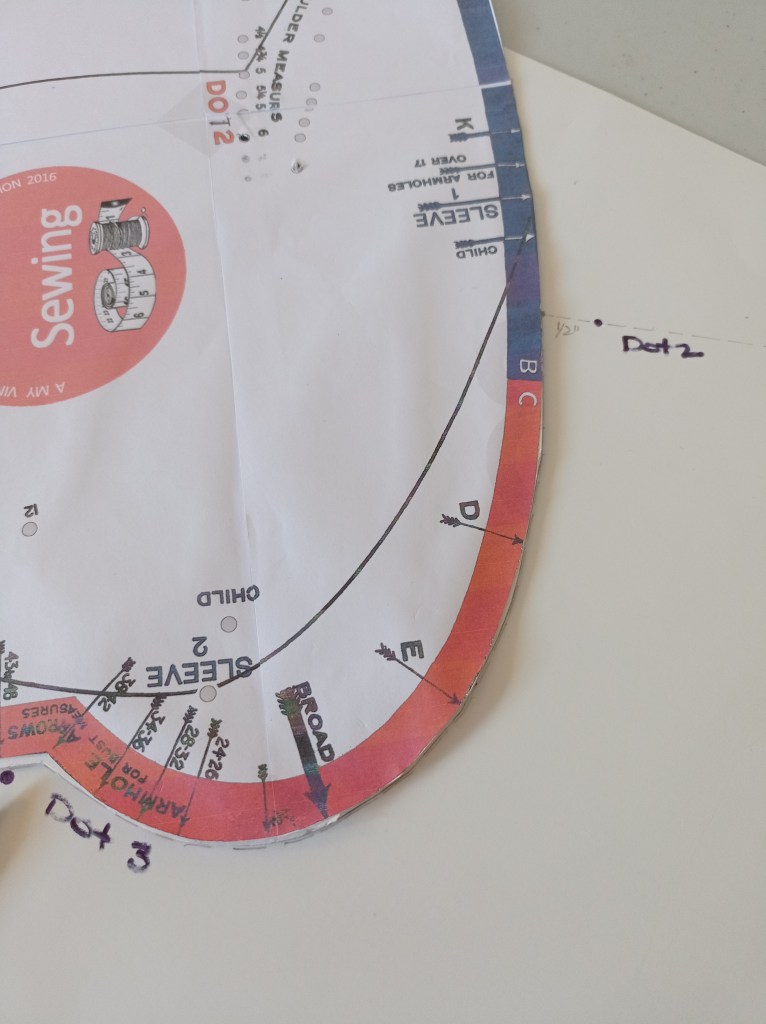
Arrow B or C (see note on bust measurements)
Dot A arrow
Dot 2 (shoulder measurement)
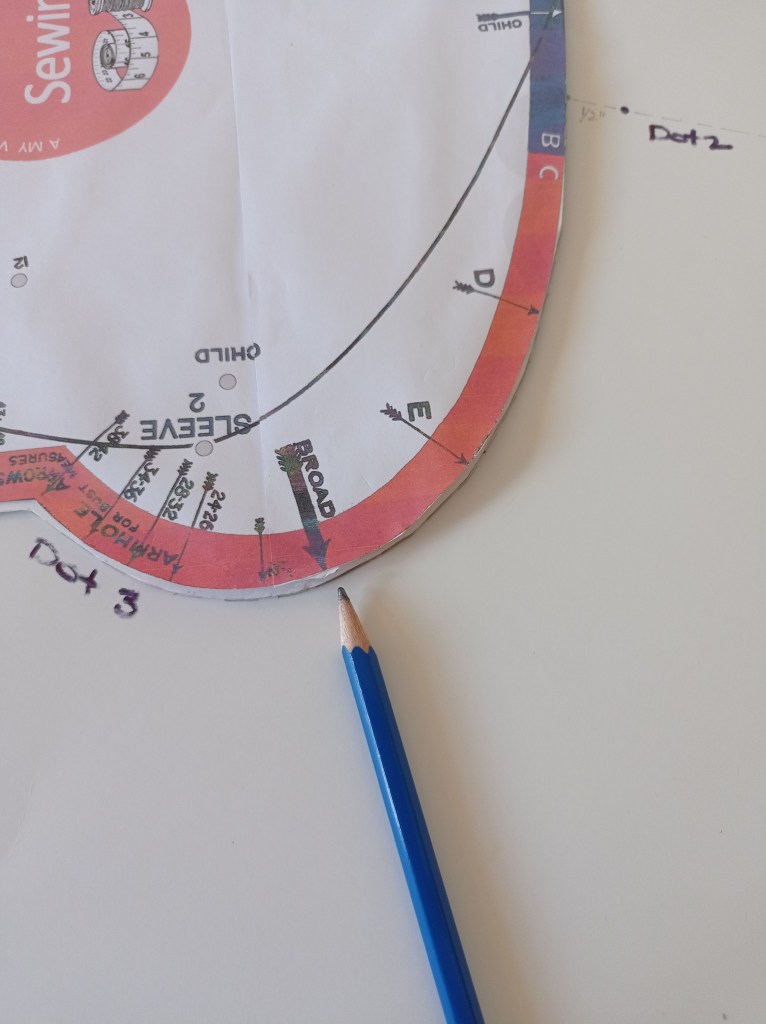
Dot 3 (bust measurement)
Make sure to note, which dot is which. Knowing where they are, will be important and help you out when you make the pattern pieces! Once you have created the above dots, you will now be moving the template around to make the rest of the lines and curves.
Neck measurement (Dot 1)
Arrow B (edge of chart. For Bust measurement up to 42″ – for bust measurements over 43″ make a dot at C arrow)

Dot A arrow

Shoulder measurement (Dot 2)

Bust measurement (Dot 3)
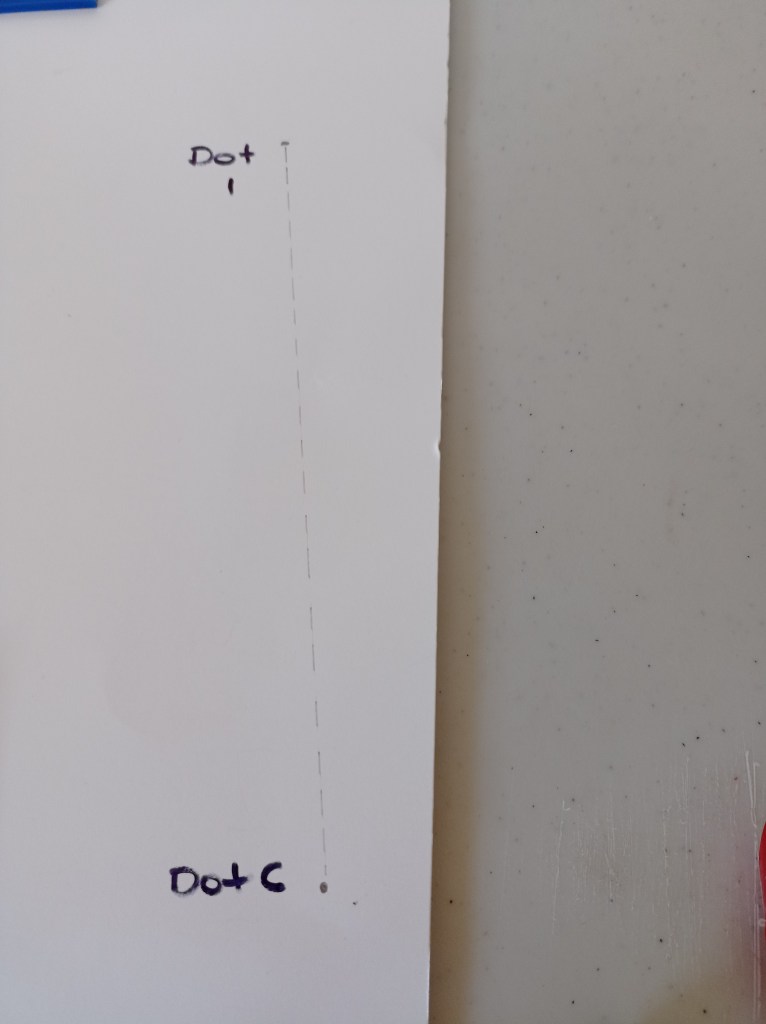
Draw a dotted line from Dot 1 to Dot B (or C – if Dot C the line must be continued for 1 1/2″ longer). Then draw a straight line to the required length. This is the Front Centre Line.


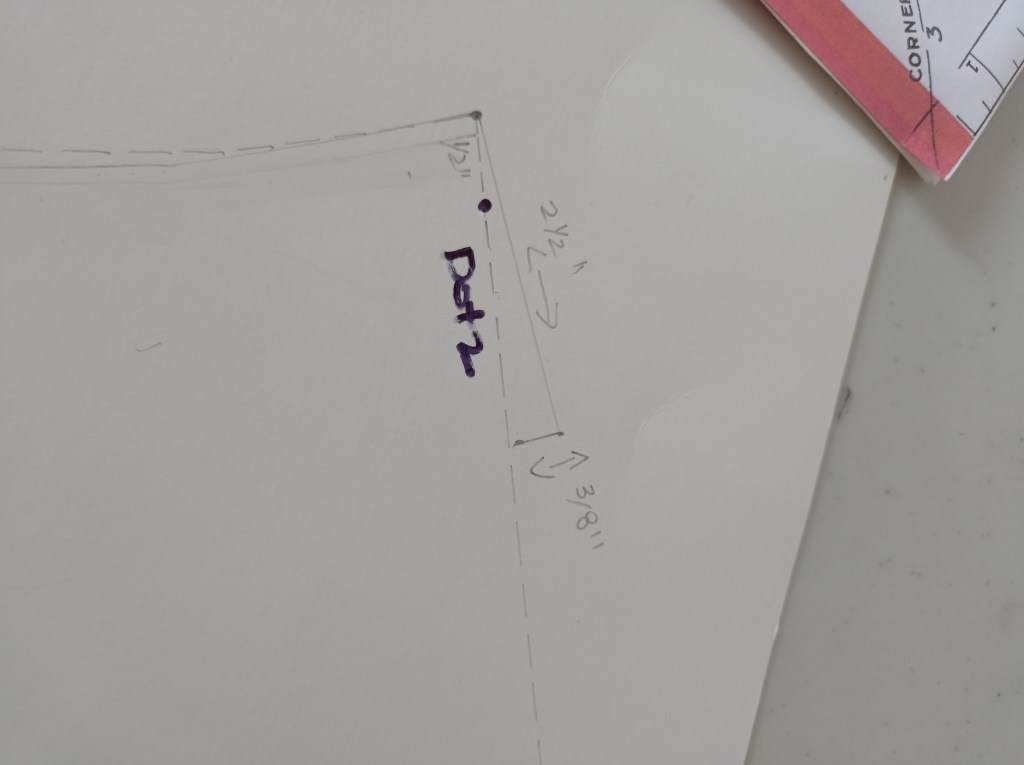
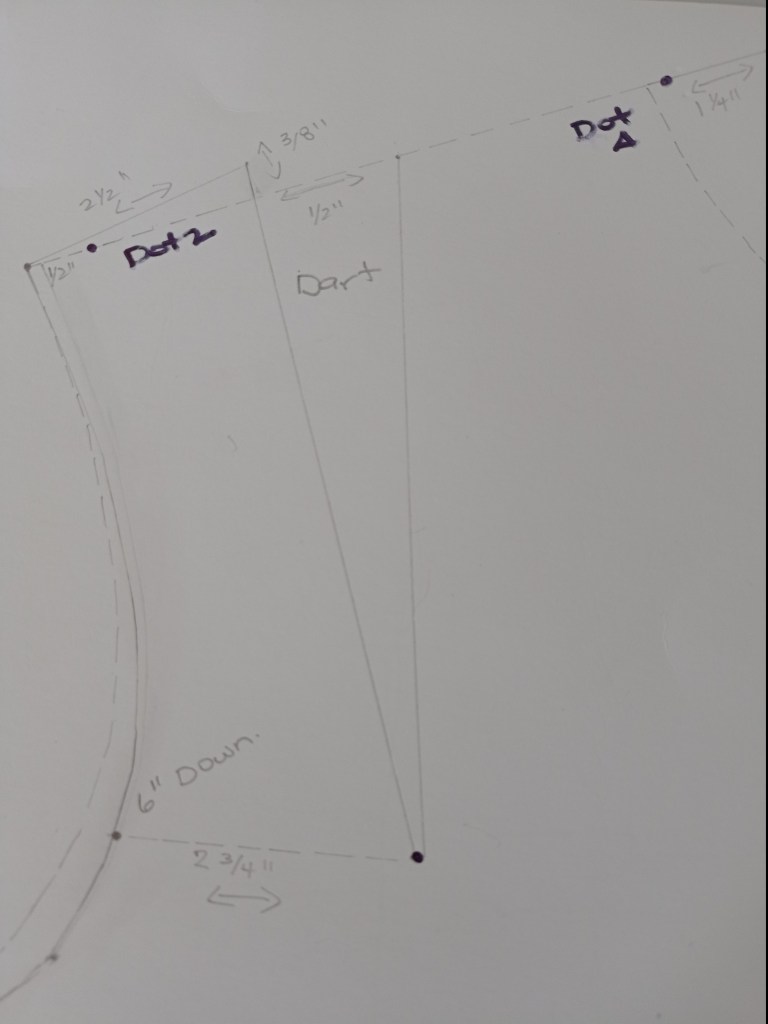
Draw a dotted Shoulder line from Dot A to Dot 2. (bust 40″+ make a dot 1/2″ to the left of Dot 2 to allow for Dart (as shown in Diagram (Foundation Draftings with Instructions)))
Draw Neck Curve. Place arrow F on Dot 1 and make a dotted line round the curve to A.

Draw Armhole Curve.
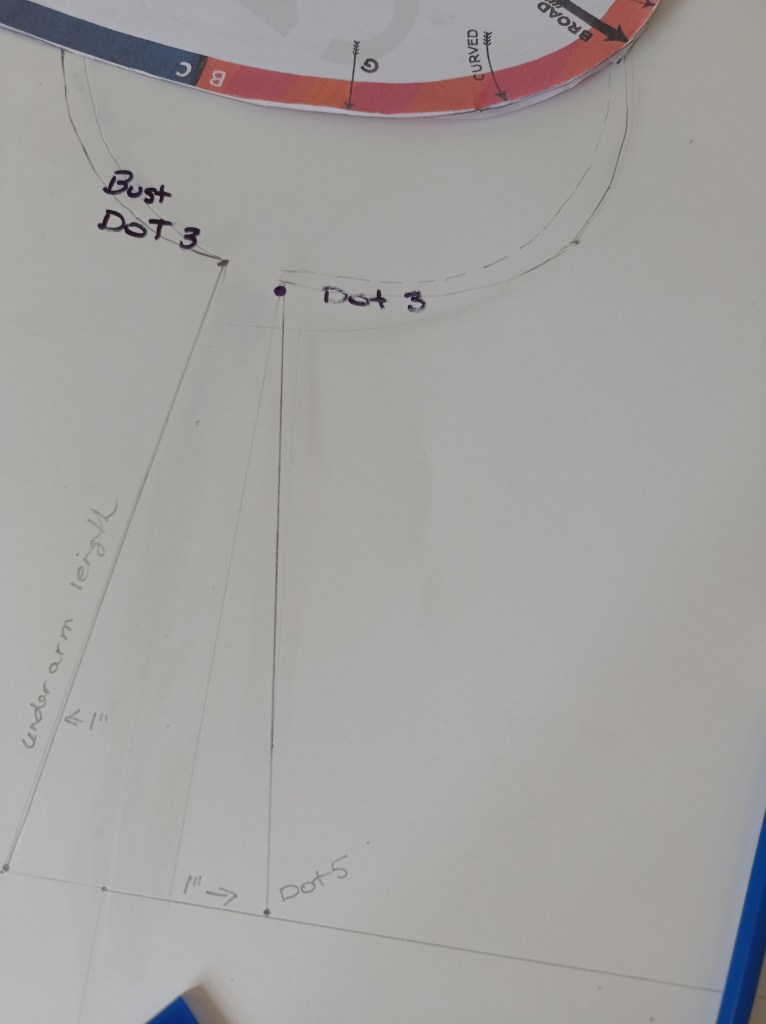
(Bust 24″-42″) turn the Chart over to the back with the long straight edge to your left, and place it to Dot 3, the Armhole arrow corresponding to the bust measurement required. Draw a line from Dot 3 to Dot 2.
(Bust 43″+) place 43″ to 48″ arrow to Dot 3, the Blue Curve touching Dot 2. Draw curve from Dot 2 to Broad Arrow, then turn chart over to the front side and place Broad Arrow to the end of the line already drawn. Complete drawing the curve to Dot 3.

Don’t move the ruler/guide! For all sizes measure 3/8″ in front of Broad Arrow and make a dot. Place Broad Arrow to this dot and draw curve to end at shoulder line. Then turn the Chart over, place Broad Arrow to the end of line already made and curve to Dot 3. This is now your Armhole Curve.
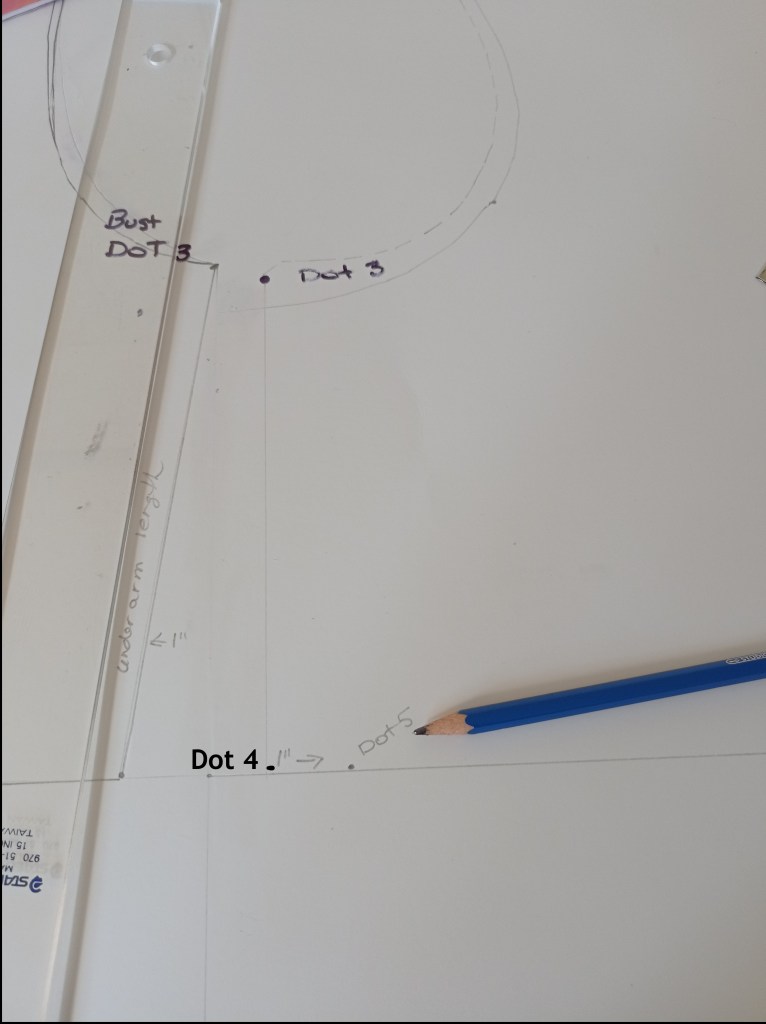
Draw the Underarm. Draw a dotted line from Dot 3 to Dot 4 (the original dot, to the left of Dot 5). Then measure inwards 1″ and mark as Dot 5. Draw a straight line from Dot 3 to Dot 5. Continue the underarm to the required length.
Shoulder dart, follow the measurements on the Diagram. (Foundation Draftings with Instructions). Do the same for the final neck measurement.

Now you have your back and front bodice slopers!

In Part 2c, we will use the bodice sloper to create a dress bodice pattern pieces!
